I used one of the sentiments, the witch, and the cauldron images for my card and colored them with pencils and Gamsol. The background was made by using a portion of a piece of scrapbook paper that I got back when I had first started stamping. It's been sitting in my Halloween collection for years!! I added some Stickles to some of the branches and some of the witch's clothing. I popped up the images with dimensionals and that's it for this spooky Halloween card.
Monday, September 27, 2010
Witchin' Halloween Challenge
I used one of the sentiments, the witch, and the cauldron images for my card and colored them with pencils and Gamsol. The background was made by using a portion of a piece of scrapbook paper that I got back when I had first started stamping. It's been sitting in my Halloween collection for years!! I added some Stickles to some of the branches and some of the witch's clothing. I popped up the images with dimensionals and that's it for this spooky Halloween card.
Sunday, September 26, 2010
Vintage Snowman
Most of what I've been making lately is Halloween themed and I really needed a break from it, so while I was at the crop at Priceless Friday night, I went down and picked out this cute snowman image from Impression Obsession. I have been wanting him since he showed up in the store a couple of weeks ago. I didn't bring any Christmas stamps with me that night, so it was the perfect excuse to add this cutie to my collection of about 5000 snowman images!! Well, it may not be that many, really, but they do take up a whole corner of my closet in the stamp room!
I was also excited to see that Trish had gotten in the 8 x 8 stack of the Graphic 45 Christmas papers. I had gotten the 12 x 12 stack, but for cards, I really prefer the smaller papers. Makes the patterns closer and better for small projects. Into the basket it went! She had also gotten in some new Nesties, so I added a set of those to my collection, too!! And here's the card!! Still haven't found my Momento black ink, so I am still working with the Prismacolor pencils and Gamsol for coloring. My Copics are feeling very neglected!! I guess I'll just have to buy a new ink pad! It's probably hiding in the same place as all four of my paper piercers!!!
Well, have a great Sunday! I'm going to spending some more time with granddaughter Kyli and then get some lesson plans done. Maybe even some stamping!!!
I was also excited to see that Trish had gotten in the 8 x 8 stack of the Graphic 45 Christmas papers. I had gotten the 12 x 12 stack, but for cards, I really prefer the smaller papers. Makes the patterns closer and better for small projects. Into the basket it went! She had also gotten in some new Nesties, so I added a set of those to my collection, too!! And here's the card!! Still haven't found my Momento black ink, so I am still working with the Prismacolor pencils and Gamsol for coloring. My Copics are feeling very neglected!! I guess I'll just have to buy a new ink pad! It's probably hiding in the same place as all four of my paper piercers!!!
Well, have a great Sunday! I'm going to spending some more time with granddaughter Kyli and then get some lesson plans done. Maybe even some stamping!!!
Saturday, September 25, 2010
This card evolved from the covered slide frame that I had made last year and never used. I used papers from the same 6x6 stack to make the background...a sheet of Basic Gray Eerie. The pumpkin image is from Heartfelt Creations and cut out with a Nestabilities pumpkin die. The little bat in the corner of the slide is from a piece of dimensional ribbon that I picked up at Priceless.
I was also playing with some other cute little papers and matching stamps and made up some bookmarks for my kids at school.
The images were colored with Prismacolor pencils and Gamsol and then spritzed them with Caramel Apple Glimmer Mist.
I was also playing with some other cute little papers and matching stamps and made up some bookmarks for my kids at school.
The images were colored with Prismacolor pencils and Gamsol and then spritzed them with Caramel Apple Glimmer Mist.
Labels:
basic gray,
bookmarks,
fall,
Halloween
Saturday, September 18, 2010
Heartfelt Pumpkins
There are so many wonderful products out in the stamping and paper crafting world and I'd just love to own every single one, but that just isn't possible! I'm so blessed to have so many stamping buddies that have the same problem because we talk to each other about what products we are planning to purchase. If it's one of those things that you just wouldn't use everyday but just gotta have, we plan which products each of us wants to buy and don't duplicate if possible. This card is a perfect example! When I saw these beautiful pumpkin images from Heartfelt Creations that coordinate with the pumpkin Nestabilities dies, I was completely smitten. Unfortunately, the combination of products was going to be a little pricey. I have a friend who was having the same dilemma so we each purchased one part of the combination and we know where to find the other part. Since we get together regularly to stamp and create, sharing is not a problem!!! I love my stamping buddies!!
This card was created by using several Nestabilities dies to make the layers. The wood grain embossing folder is by Tim Holtz, papers are Apple Cider by Imaginisce. The image is colored with Prismacolor pencils and Gamsol and then spritzed with Caramel Apple Glimmer Mist. I had to fussy cut the vines for the pumpkins, but I think it was worth it!!!
Monday, September 13, 2010
Bookmark challenge
I made a bookmark for the challenge this week at Totally Stampalicious using one of the newest Bugaboo digi images turned into acrylic by TS. The challenge is to make a bookmark and I have been wanting to make some of the cool corner bookmarks I have been seeing around. There is a great tutorial on SCS by Beate Johns.
For my project, I used Bubble Bath Scarlette and Linen Closet papers by DCWV. The image was colored with Prismacolor pencils and Gamsol. Here is a shot of the bookmark inserted into a book to show how it works.
All of the bubbles have lots of glitter added. I hear that reading in the bath is a relaxing past time but something I wouldn't know from personal experience. I would never take a book into the tub with me as I tend to get very sleep while reading....need I say more?
For my project, I used Bubble Bath Scarlette and Linen Closet papers by DCWV. The image was colored with Prismacolor pencils and Gamsol. Here is a shot of the bookmark inserted into a book to show how it works.
All of the bubbles have lots of glitter added. I hear that reading in the bath is a relaxing past time but something I wouldn't know from personal experience. I would never take a book into the tub with me as I tend to get very sleep while reading....need I say more?
Sunday, September 12, 2010
Back to School
I took part in a swap of Back to School themed cards and this is what I came up with. This cute Gruffy from House Mouse pretty well represents where I've been at most days since the start of the school year!! Sometimes I feel like I'm always buried in books for lesson plans, ideas, previewing text, and whatever else I need to do. The dsp is Nook and Pantry by Basic Gray. The crochet trim is from the bargain bins at JoAnn's. The image is colored with Prismacolor pencils and Gamsol.
Saturday, September 11, 2010
Magnolia with a kitty and some paper flowers
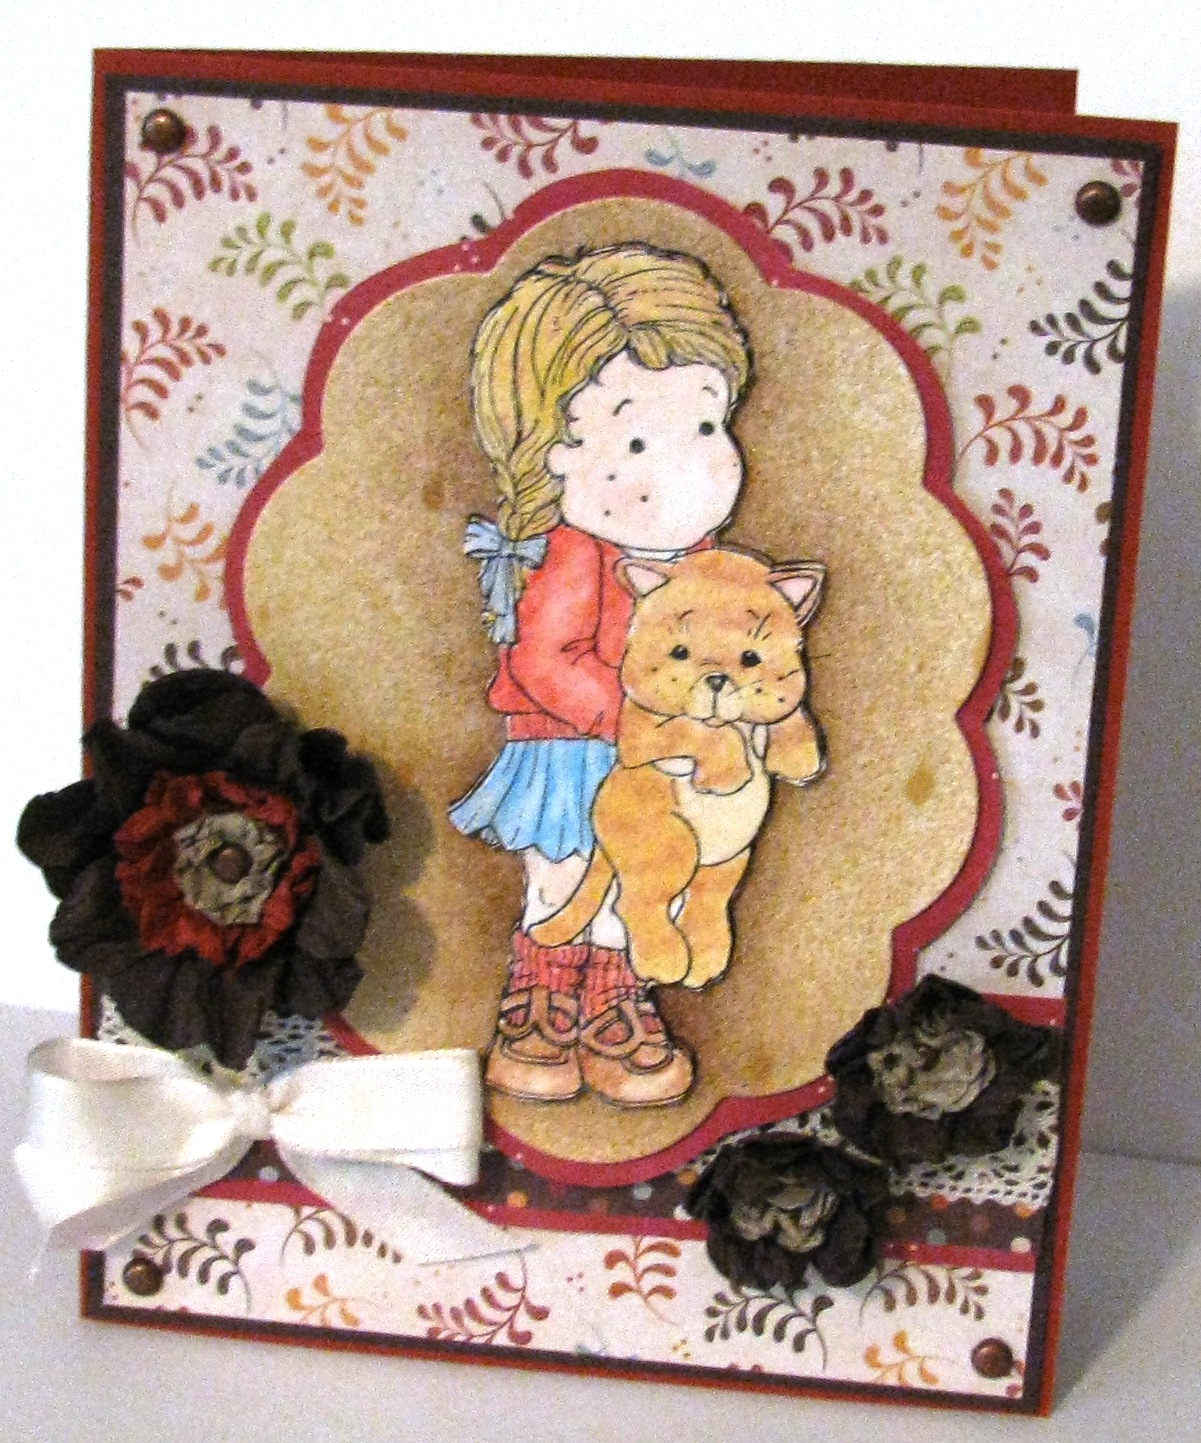
Here's a card I made a few weeks ago with one of my recently purchased Magnolia images. The image is colored with Prismacolor pencils and Gamsol. I cut her out and popped her up on top of a sponged background. The background was also sprayed with Caramel Apple Glimmer Mist, my new favorite color of these awesome sprays. Had to free hand cut the rust layer around the large scalloped Nestabilities layer to get the width I wanted on my layers. The flowers were made with various flower punches which were stacked and attached together with a brad, then soaked with water to shape them. I love this new way of making flowers!! Thanks for stopping in!!!
Subscribe to:
Posts (Atom)