Sunday, May 6, 2012

Taking a time out

Hello to the blog world. I know that I don't get on here as frequently as I'd like to, but I think there is going to be an even greater decrease in my presence here. The unthinkable has happened to our family. My precious granddaughter Kyli who is only four years old has been diagnosed with Acute Lymphoblastic Leukemia. She has been at Shands Teaching Hospital in Gainesville, Florida for the past week. While her prognosis appears to be good because it was caught so early and the many factors that are in her favor, she has an extremely difficult three years ahead of her.

I have to say that my son and daughter-in-law have stepped up and handling the tough role that has been handed to them in a way that makes my heart burst with pride. And that sweet little girl is being so strong and tough! It makes me soooooo sad that she has to learn to be so tough at such a young age.
A Facebook page has been set up for anyone who would like to keep up to date on her progress and stay in touch with the family during her treatment. If you go to the page and "like" it, you will receive updates in your newsfeed whenever you login to Facebook.
I just wanted to let ya'll know why I won't be on here as much as I'd like. Prayers are greatly appreciated...we truly believe in God's power to heal and bring comfort. Thanks in advance and big cyber hugs to my blogger friends!

Monday, April 9, 2012

Chocolate Is Good

In response to a challenge for an online group I share with, I made this card in a non-traditional size. This will fit in a standard letter-size envie and measures 4 x 9 1/4. Using my new paper organization strategy, it was very easy to pick out the papers I wanted to use. All my pinkish papers were together and the back of one of them had the design that was heavy in the browns. The stamps are from a set by My Favorite Things and colored with Copic markers. I used a silver pen to color in the foil wrapper on the chocolate bar.

Sunday, April 8, 2012

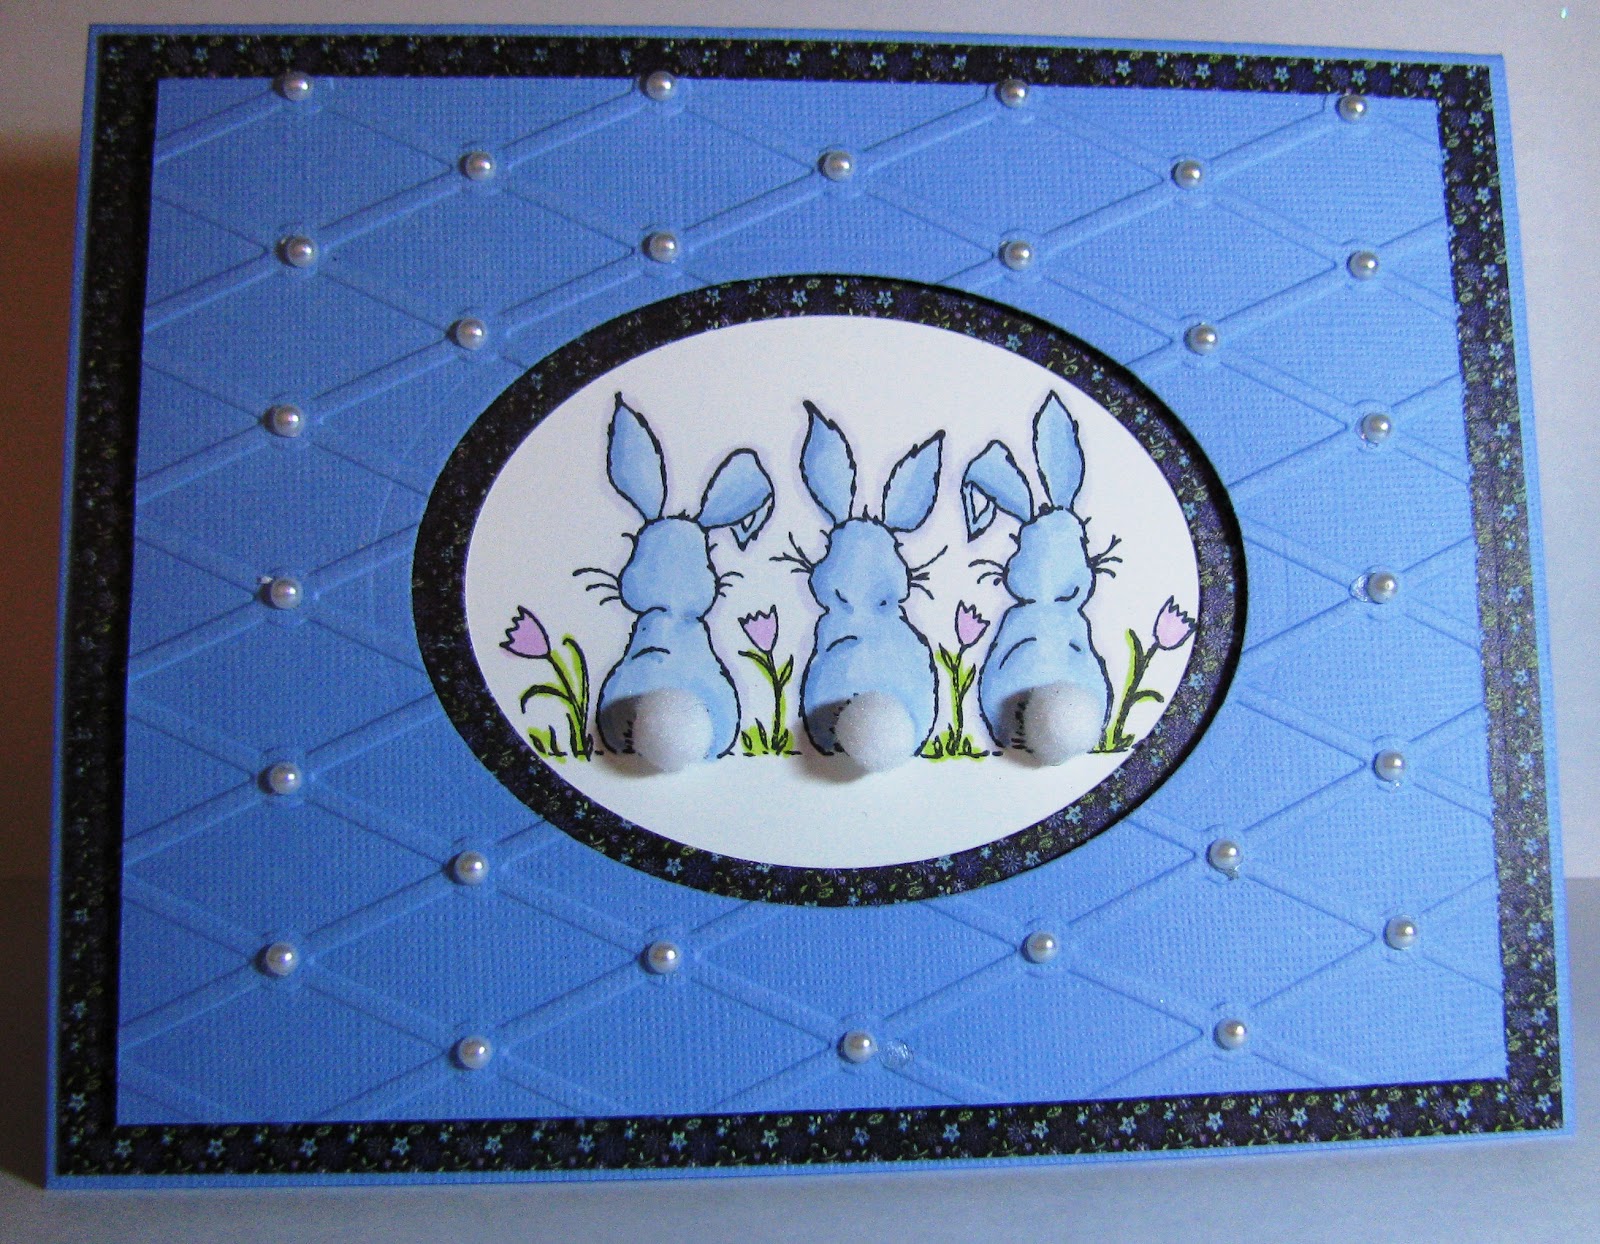
Three Bunny Butts Card

Here is my second Easter card; this one is for Kyli. She oohed and aahed like a professional when she saw it. She's my little stamper in training! The image is from Great Impressions....one I didn't really need but had to have because I knew Kyli would love it.
We had a wonderful Easter with her. We planted magic jelly beans which had grown into a giant lollipop by morning. The Easter Bunny had hidden the eggs we colored yesterday, and then we had some fun playing with the goodies in her basket, which had crafty items, a puzzle, bubbles, and some other odds and ends. Couldn't have asked for better weather today, either. What a gorgeous day!!! My only regret is that we didn't make it to sunrise service this morning. Easter blessings to all of you!!

Saturday, April 7, 2012

Three Bunnies Easter Card

 Finishing my Easter cards in the nick of time. This one is for my granddaughter, Liberty. I will share the card I made for Kyli tomorrow. This one uses a Stampavie image with papers by Memory Box. I colored it with my neglected Copic markers. I tried to keep it simple for the sake of time.
 Hope everyone has a wonderful Easter, fun for the kids and celebrating what the holiday is really about! The most joyous day on the Christian calendar!!

Saturday, March 24, 2012

Butterfly Tag

It only took three days to make my project this time!! I had a couple of new butterfly dies I was wanting to play with and this is what I came up with. While sorting through my dsp, I came across some papers in shades of pinks and grays and even though those papers did not end up on my tag, they were definitely the inspiration for it. The butterfly dies are by Cherry Lynn Designs. The rest is an assortment of items from the scrap pile and neglected embellishments.
 The dark gray flower was made using the newest flower punch from SU! I punched a couple of the flowers and then ran them through the paper crimper a couple of times and them wadded them up. I then opened them and separated the layers and stacked them up, securing them with a big pink blingy brad from Hobby Lobby. I used graphite Glimmer Mist on the flower to give it some shimmer.
 The papers for the tag are all torn, inked, and dry embossed. The ribbons and fibers are all from the scrap jar. I even managed to use some of my hoarded Hodgepodge Hardware!
I'm rather pleased with how this turned out and hope you like it, too!

Thursday, March 22, 2012

Zentangle Gift Box

I found this gift box to hold a bottle of wine or some other spirits on a clearance table at the LSS. It was solid white with just the black ribbon closure. I immediately thought it would make a great Zentangle project so I bought it and amazingly, the tangling got done within just a couple of weeks. But that's where the forward progress ended for a while. It took forever to get out the can of clear sealer and spray it. Then it took several more days to add the paper, ribbon and tag. I bought the box over Christmas break and finally completing this project on Spring break!
The paper at the bottom is by Queen and Co. and the pleated ribbon is SU!
I received the die to make the flower from a dear friend as an early birthday present. It's by Memory Box. They make some of the prettiest dies...so intricate and elegant!
Now, what to use it for? I decided to stamp the tag for a birthday gift. I wanted to take a photo of the box opened up, but I didn't want to leave it empty for the photo. Hubby and I don't drink (alcohol definitely comes under the heading of processed foods) so I found the only appropriate bottle I had in the house...a bottle of cane syrup from the a friend of the farm!! (Hubby's not off the processed foods)

Well, that's three incomplete projects that have been put to bed for me over Spring break so far. The other two are sets of cards I had started using Northwoods stamps. Both sets still needed the finishing touches of coloring and glitter added to them and I got that done yesterday. Today, I'm off to find the floor of my stamp room and maybe even the table!! Wish me luck!!

Wednesday, March 21, 2012

Glitter Cards

I received a card with the coolest fold and the giver of the card was kind enough to share the directions with me. It turned out to be much simpler than it looked and I decided to use the fold to create a card for an upcoming glitter class I will be teaching at the LSS. I am doing two cards using the same stickers and nearly the same colors of glitter...it's all about learning the technique. Here is the second card using a double Z fold.

Here is a shot of the two cards together.