Wednesday, December 30, 2009

2010 New Year Dragons


I made some New Year cards this year, something I have never done before. I had this adorable dragon digital image from Dustin Pike and without adjustments, he will be obsolete in a few days. This was a free image that Dustin released on his blog a few weeks ago. He typically releases one free digital image each week and has other images you can buy singly or in sets. This is a great example of his style which I think is just adorable!
I used an old sketch challenge from Splitcoaststampers, number 158 to be exact. The front of the card is shorter than the back and the image panel is dropped down to make up the difference. This layout really forces you do decorate the inside of your card, something I have struggled with for years!
The images were colored with Copic markers with some glitter added to some parts. The glittery papers are from a neglected stack called All Dressed Up from DCWV. I used a computer-generated sentiment on the inside above the dp panel. It simply says "Happy New Year."
I am off to work on my stamp room this morning. Tricia is hosting a stamp/scrap yard sale down at Priceless on the 23rd of January. I have lots of "stuff" that needs to find a better home...just have to sort it out.....

Tuesday, December 29, 2009

Love Birds


When I saw the new Basic Gray Origins papers hanging in Priceless, I knew I had to have them! What a breath of fresh air from all the Christmas papers I had been looking at. The new Bo Bunny papers and accessories were hanging on the next rack over and the cute love bird stamps were just too adorable to resist. I could just picture paired up with the BG papers! Here is the result.
The papers are mounted on a Garden Green (SU) base. I used a Fiskars corner punch with triple hearts on the brown layer. The SU Top Note die was used for the white layer. The birds were stamped on white card stock with Sepia Versafine ink and then heat embossed with clear embossing powder. I added color using just a cople of Copic markers and cut them out. They are popped up on dimensionals and perched on a strip of green paper from the Origins pad. The yellow flowers were punched out and layered with chocolate (from the scrap pile...non SU). I stamped out the words Love Birds and shaded them with the palest green Copic makes and then cut out using random borders and mounted on Garden Green.
Kenny and I have an anniversary coming up in January. Wow! Twenty years!! I'm afraid to ask him if he'd marry me again after twenty years. Some days I'm not sure I'd get the answer I want. I have to admit that the schooling years and new job stress have caused me to be just a little bit crabby some days.
I think I will use this as his anniversary card. I still need to come up with a birthday card for him. His birthday is two days before Valentine's Day....geez....another card! At least I get to keep them in my stash if they are really good cards!
Well, I'm off for a day of play at Priceless. Got a few goodies when I went yesterday for the after Christmas sale, but my favorite thing was a double sided lace jumbo border punch by Martha Stewart!! Thanks for stopping in!!!

Monday, December 28, 2009

Ribbon Wreath


 Last night, I was checking out the gallery for the featured stamper challenge over at splitcoaststampers and I came across this lovely card by suen. I loved the ribbon wreath she had made for the card and was thrilled to see she had included the link for the video tutorial with her post. I immediately ran to the stamp room and grabbed a bobbin of ribbon and made one.....sooooooo easy!!
This morning I used my wreath on this card which is made from scraps of at least two sets of Basic Gray Christmas papers from years past. Also used some Chocolate Chip and River Rock card stock that was with these scraps. I think I had made star books are some other such project with this stack of scraps. Added lots of little blingies to it....you know how I like that bling The sketch I used was spotted on one of the blogs I read. It's from Skipping Stones Sketch Tuesday. It wasn't on the Skipping Stones blog, so I'm not even sure this is a current sketch for them, but here is the sketch I used.


The card measures 5 1/4" square. The wreath takes approximately two yards of ribbon to make. I used a 1/4" satin ribbon I found at Target in the wedding and party department. Well, I'm off to see what I can pick up at Priceless. Tricia is having her after Christmas sale today! If you are in the area, you should stop by and don't forget you pink Priceless bag because you get an additional 20% off of the discounted Christmas merchandise! Awesome deal!!
 

Saturday, December 26, 2009

Snowy Ornaments


I first saw these ornaments a few years ago on Splitcoaststampers and wanted to make them as the annual ornament for the kids and grandkids. I finally got around to getting the supplies to make them a couple of years ago right after Christmas. Then the supplies sat in the closet until the following summer when I dug them out and made them up. I knew they weren't completed and so they did not get used last year. Over this past summer, I must have gotten them out and added the faces (rub-ons) that had been in my stash for longer than the other supplies. I ran across them the other day while looking for a piece of ribbon to make up into a giant bow for one of Kyli's big gifts from Santa. When I pulled them out to finish them off, I was surprised to see that I had already done them. Maybe I didn't...maybe it was an elf or something that found them and put on the finishing touches? Anyway, some of them actually got passed out yesterday during our Christmas celebration. Had to keep one for myself, too!
Now, what to make for next year's ornaments? Maybe I should dig out those nearly completed counted cross stitch snowman ornaments that I haven't touched in about five years? I think I'll worry about that a little later. For today, I plan to spend some time in my neglected stamp room! Happy stamping!

Had to come back and add a couple of details after reading Anne's comment below! The hats are made from infant socks. the top of the sock is glued to the ball and the toes are cut into strips and then tied with cord and ribbon to make the pom pom part. The cord for hanging is added to the hanger of the bulb before closing the "toe' of the sock with ribbon. Thanks for leaving such a sweet comment, Anne! I haven't been blogging all that long, so I'm not surprised I'm still a little incognito! Hugs, Lynnor

Thursday, December 24, 2009

Merry Christmas To All!!


Wanted to wish everyone a merry Christmas! We had some of the family over for Christmas Eve. We enjoyed a simple dinner and then rode out to the Cade's (second trip for me and Kenny this year) so the some of the family who had never seen the fabulous light display could check it out. They were not disappointed!
The cards above are the gift card holders I made to be used for the kids this year. I usually get the teenagers gift cards to their favorite stores. The design for these cards was published in an issue of CardMaker magazine that I saw back in September at Scrap Pink. For mine, I used Basic Gray's Eskimo Kisses 6 x 6 pad The stamped images are by Stampin' Up!, though I don't recall which set at the moment and my stamp room has been a declared a disaster area and not fit for human habitation. I hope to take care of that situation this weekend!
I hope each of you has a joyous Christmas! I am certainly enjoying mine so far. Will have a house full again tomorrow for dinner! I'm really looking forward to it! Merry Christmas and good night!

Sunday, December 13, 2009

Cute Kitty with Santa Hat and a night of lights...


I've had quite a busy and enjoyable weekend so far. It started with a Christmas party at Priceless Scrapbooks. We had a crop and covered dish dinner. The excellent company made up for my lack of productivity at the crafting table. This was the only card I made all evening and it took almost four hours to do. That's pretty sad considering the image was already colored from Thursday evening!
This cute little kitty is a Penny Black image that actually has the kitties all on one stamp. I just punched out portions of each kitty as he investigates the Santa hat he finds. The snowflakes are punched from another sheet of the same SEI papers that I used for the background. Not much more to tell about the card....it measure 5 1/4 " square.
Finally got my Christmas tree up Saturday morning. I usually do it the day after Thanksgiving, but as I was not feeling well, it didn't get done and didn't find another day to do it until yesterday. I'm so glad it's up....tuned out really pretty!
After I got the tree up, Kenny and I went to pick up Kyli. We wanted to take her to see the lights out at the Cade's in Orange Springs. This couple has been putting up their light display for at least 14 years and it's just gorgeous!
Unlike most light displays, these people ask you to park your car and invite you to walk all throught the property to enjoy the lights! Kyli loved it!! We actually had to walk back through a second time because as we started to head for the car, she livened up and wanted to see it again. So glad we did, or we would have missed the fish swimming in the fountain!! 

Kyli loves these antlers. For those of you who have seen my avatar over at Splitcoaststampers, you may recognize them as being the ones that Ice is wearing. I don't think Ice is going to get to wear them anymore. Kyli wore them all evening....poor PaPa kept getting bopped in the face when he was carrying Kyli through the lights!

The Cade's have lit up the dock out on the lake. You can walk out there and enjoy the lights from one of the benches they have sitting along the way. If you live anywhere nearby, you should definitely make plans to ride out and see this place. We go nearly every year and there is something new every time we go. The pictures I have posted here don't show half of what there is to see!

If you are still with me, thanks for reading my ramblings. I hope you have a great day and get to do something really creative!! I plan to!!

Saturday, December 5, 2009

Life is a journey....


I'd really like to get back to the place where it didn't take me three days to complete a card! Hopefully I will get lots of creating done today at the all day crop down at Priceless! There is so much going on in town today....the big game....GO GATORS!!!, the Christmas parade just a few blocks from where I will be, and some other things that I won't be doing because I'll be stamping! That's kinda nice that it won't be a bunch of other things instead of stamping, for a change. You can bet that Gator game will be on at the crop though....hehehehe!!
Poor little Kyli was at the Children's Express yesterday with a 104 temp. They said it's a throat infection, gave Mommy and Daddy some scripts and got her temp down. She was lookin' pretty good again by the time we left there. I got the message about her going to the ER as I was leaving work yesterday and just went straight into town.
Anyway, enough of my rambling....I used some Halloween paper to make this card. Saw it at Priceless and it just screamed to be used with the Road Hawg set from Totally Stampalicious. They have a sketch challenge going on over there this week and I got this done with very little time to spare! It still didn't turn out like I pictured it in my head, but I guess my cards rarely do. I used a Close To My Heart set to add the zipper along the border. Glitter gel pen made all the chrome parts of the bike shimmer and a little Crystal Effects gave his paint job a lacquered look. Of course, I had to pull out the Diamond Plate embossing folder!! I am considering adding a sentiment to the bottom of the card, but haven't made up my mind which one I want to use yet. I think I will wait until I actually send the card to in order to make it appropriate.
Sue and I were talking about this card yesterday during homeroom. We kept coming up with more ideas for future cards made with this set, zippers, and leather. The kids probably all think we are crazy because we get all excited about making things out of paper! That's okay...they don't know that being a little crazy is one of the job requirements of being an ESE teacher!!
If you made it this far, thanks for hanging in with all my blah, blah, blah....
Have a great day.... I hope you get to lots of creating!!

Wednesday, December 2, 2009

Holly Fairy


I am so proud of myself for actually using some of this gorgeous snowflake ribbon I found at Priceless Scrapbooks. It is from May Arts. I only bought a yard, but I think I'm going to get some more when I go in this weekend. The image on this card is a digital image from one of my favorite digital image artists, Mo Manning. The snow globe the fairy is holding has some glitter added to it and then I added some Crystal Effects to make it look like glass. Of course, I added glitter to everything else in sight, too. Love that about making Christmas cards....glitter always works!! Colored my image with Copic markers. I'm starting to acquire more colors and it is a little easier to get some shading on my images, though I still have a long way to go before I could compare to some of the other wonderful artists in the blog world.
Stamps: Digital image by Mo Manning
Paper: GP white, Lovely Lilac, Wild Wasabi
Accessories: Computer, printer, Copic markers, glitter, Crystal Effects, brads, May Arts snowflake ribbon and green apple ribbon, border punch by Martha Stewart, embossing folder for background texture.

Friday, November 27, 2009

Pink Snow Fairy


Happy Friday! I'm hoping to get my Christmas tree up today. I was going to go to the Friday night crop down at Priceless Scrapbooks, but I have a bit of a scratchy throat and have been feeling a little achy the past couple of days. I think it's best I just keep myself close to the house and not share with anyone!
I made this card using a digi image from Pink Cat Studio. The glittery paper in the background was purchased with this stamp in mind. I knew I wanted to make a glittery pink fairy card. The glitter doesn't show up very well in the photo. Had a hard time getting a picture that didn't blind you because of all the glitter and being able to see the glitter at all. Added some blings around and popped up the whole image layer on dimensionals. I love how this card turned out and want to try some more in some different colors.

Tuesday, November 24, 2009

Merry Christmas Horses


 I just love this image!!! I would love to see a couple of beautiful horses looking thoughtfully over the fence at me with their Santa caps on. The trim on the hats is all puffy with liquid applique with a light dusting of glitter.....yes, just a little bit! To give the iamge an aged look, I did the faux burnt edges technique that I learned how to do over at  Splitcoaststampers.
Stamps: Impression Obsession
Paper: vanilla card stock, always artichoke, chocolate chip, unknown red dp
Ink: Momento Tuxedo black, assorted distress inks
Accessories: sponge, liquid aplique, glitter, red marker, ribbon, brads

Monday, November 23, 2009

Rockin' Frog Santa


I was diggin through my Christmas stash and came across this Santa suit from Jolee's and thought one of the Totally Stampalicious characters would look cute dressed up in it. I chose the Rockin' Frog set to make my Santa but I had to substitute a different guitar because the size of the Santa suit. I used the guitar from the Inkadinkadoo Rock Star set. Stamped it in Versafine black ink and added some clear embossing powder right away. It gave the guitar a nice lacquered shine. Found a few stars, also by Jolee's to add to the corner of the card. That Blitzen paper from Basic Gray was still on the table, so it ended up on this card also. Well, that's the deal for this quickie card. I think he's kinda cute but will definitely present a challenge when it comes time to mail him....maybe I should hand-deliver this one?

Sunday, November 22, 2009

Willameana stair step


What a rainy, yucky day this turned out to be! Good day to be inside. I decided to go ahead and finish this second card made with the new set from Totally Stampalicious. The Christmas tree image is from a See Dees set I've had for years and used very little. Decorated up the tree with a variety of stickles and pearly paint.Papers are from Basic Gray and Stampin' Up! The snowflake border punch is by Martha Stewart.
As for the funny shadow on Willameana's hair, well, that's a major "Oops!!" I had added dimensional glaze to her eys and had forgotten I had done it. After fiddling with something else for a while, I picked her back up and turned her over to add some pop dots to the back. Let's just say, Thank goodness for a heat tool and clear embossing powder. It's not nearly as noticeable in real life. This sure didn't turn out like I had pictured it in my head but it will have to do for today. Really have to get those lesson plans done!

Sweet girl with teddy


Another one of those cards that took me a week to make! I started playing with this Tuesday evening and finally finished it last night just before bed. I am so hooked on these easel cards! I love the style and the dramatic presentation! This one is made using an amage by Sarah Kay that I received from my sparkle buddy StampMuse over on SCS. I love this little image....reminds me of Kyli! I used some more of the Blitzen collection papers from Basic Gray that were still out on my table. Here is a view of the open card.

The sentiment is from a  retired Stampin' Up! set. The green ribbon is by May Arts and is the prettiest apple green. I used some distress ink to tone it down a little. The trim on the right side of the card is some that I picked up at JoAnn's. I keep meaning to stop by and pick up some more of these pretty trims, but out JoAnn's is in a plaza that I don't get into very often. I definitely will over the Thanksgiving holiday!
I just have to include a close up of the cool piece of hardware that serves as the prop for the easel.
 
Isn't it cool?? I received this a couple of years ago from one of my Canadian stammping buddies over on SCS, Wenchie. It is made of aged metal and weighs a ton, but I love it!!
Well, I have a little bit of work to do for work tomorrow and then I hope to get back into the stamp room again for a while. I have another card planned using Willameana from Totally Stampalicious....that bad little girl makes me smile!

Sunday, November 15, 2009

Oh, my frog!!!


Got a few minutes to play today and decided to make a fun card with one of the new digital images just released last week by Dustin Pike.  This fun little frog image is part of a set called Mistletoads and every one of the images is "toad"ally adorable! I'm sure most of us will be feeling like this before the Christmas season is over. I'm thinking this will probably end up going to my eldest step-daughter as we get closer to the big holiday. The girls and I go on an annual shopping expedition and Michele and I typically end up doing a couple of extra rounds to help her finish up the last minute shopping. Then I arrive at her house very early on Christmas eve to start the cooking for the big family get-together. I think she will get a smile from it!
I coloed the image with Copic markers. I added some liquid applique and glitter. Then I covered the globe part of the iamge with a piece of acetate that I attached with diamond glaze. Added some gooey snow stuff I found at Hobby Lobby in the craft section. You can never have too much glitter? Right????
The papers are from my hoarded collection of Basic Gray papers. These are from the Blitzen collection....that goes back a while, huh? The card base is Soft Suede.
Well, off to do a little coloring before I have to start dinner. If I have a couple of things colored up with a plan, maybe I'll get to stamp during the week. Thanks for stopping in!!

Friday, November 13, 2009

Snowglobe Snowman Tag


It took me all week to get this done. Grabbed a few minutes of play time here and there. Then it took forever to get a picture. Between the dome and the glitter, it was eeally difficult to get a shot without getting so much glare the image was unseeable.
Anyway, the cute little snowman is from one of the newly released sets from Totally Stampalicious. This set is called Snowmen and has two different snowman images, accessories and lots of cute little sentiments. I colored my image with Copic markers and cut him out. I picked up the little ttreat box at my local scrapbook and stamping store, Priceless Scrapbooks. The papers are from an older set of Basic Gray Christmas papers. I used the page of punched tags for the main part of the tag. I mounted it on Ruby Red cardstock after cutting a circle with my Coluzzle. The image is popped up on dimentsionals inside the dome. I added Polar White Flower Soft and chunky glitter to the dome. After putting it all together I added some more little tags, and some glittered up foam snowflakes. Added a little extra chucky glitter on some of the snowflakes on the papers. The Merry Christmas sentiment is a Michael's dollar stamp that I've had for ages. One of my favorite Christmas sentiment stamps....love the font!
The ribbons are a mixture of silver, icey blue and a bit of silver cord. The red meshy ribbon is thanks to one of my best stamping buds, Bonnie!! Thanks, Bonnie, and to Carl, too. It is made from drywall tape that was spraypainted to give it color. I cut it into thin strips and added it to my bow for a splash of color.
Well, that's about all my creating for this week. Maybe I'll get some stamping time in this weekend!! Thanks for stopping by!

Friday, November 6, 2009

New Totally Stampalicious release!

Totally Stampalicioius has released two new sets today in time for Christmas and they are super cute!! I made an acetate card using the Snowmen set. I have to thank my sparkle buddy, StampMuse from Splitcoaststampers for the most of the pretty shimmery papers on this card. She sent them my way a couple of months ago and I have finally cut into some of them! I think they were perfect for a snowman card! Haven't done an acetate card in quite a while. I think the sentiment about needing a higher SPF is perfect for this guy, too.....coming from Florida and all , I mean!


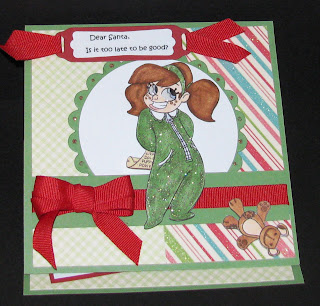
The second set is full of sassy little sayings to go with the cute little girl image. I made Wish List Girl into an easel card. I love this fold!! Added glitter to her jammies and a little Crystal Effects to her eyes. Do you think she'll talk Santa into leaving her a few gifts? The papers are from the All About Girls stack. Very glittery and girly. All of my images were  colored with Copic markers. Be sure to check out the blogs of the other designers to see more samples.... you can find links to all the blogs here.


Sunday, November 1, 2009

I lost my head!!


This is a card I made at Scrap Pink at the end of September. The image is from Impression Obsessiona. I just love this cute little stamp! Sure hope someone stops and helps the poor little fella get his head back on!! the papers are from SEI. Glittered up a couple of chipboard flourishes and popped the image layer up on dimensionals.
On a personal note, I went with Robbie and Linda to take Kyli trick or treating. She really has the idea! She put more miles on her little 20 month old legs than any of the older kids who with with the group. She was so cute in her little princess costume. Linda had a matching costume. Then today, Kyli and I went to the fall festival in Micanopy and checked out all the arts and crafts. Found some adorable little bibs for her that will actually cover the front of her clothes. Of course, we had to get a bag of fresh kettle corn! This really was a great weekend! Thanks for checking in with me!


Saturday, October 31, 2009

Hang In There!!


Finally got to play one of the challenges over on Splitcoaststampers, and what a fun one it was today! The inspiration site today was Franz Porcelain and I just loved the little monkey pieces....so fun!! I really had a haard time choosing just one of the hundreds of gorgeous pieces on this site, but I really wanted to do something fun this morning. It's been rough at work with all the long hours and paper work!
The little monkey image I used is a digital image Dustin Pike. He has some of the cutest little whimsical images and offers little freebies once a week.
Well, I want to get some more stamping done. Who knows what Halloween  has in store for me. I'm hoping to  get Kyli later today or even this evening.  Should be fun with her this year!

Sunday, October 25, 2009

Totally Stampalicious Eat More Turkey!!!!

\
Kyli has been here most of the weekend, but after spending most of the morning outside exploring, she went down for a nearly three hour nap! I managed to get some chili in the crockpot for dinner and then sneaked into the stamp room. I had so much stuff piled on my table that I had to clean it off before I could think about doing anything else. When I got to the bottom, I found the base for a stair step card that I had thought about playing with last week and my latest set of stamps from Totally Stampalicious. I love this farmer hawg dude! So much fun to color! Except for the base, all of the papers came out of the scrap pile. I did my coloring with Copic and Prismacolor markers.

Saturday, October 24, 2009

John Deere easel card

It seems like it takes forever for me to find a few minutes to stamp something and get it posted here, or anywhere else, for that matter! One of my friends at work has a grandson who is turning one this next week and while she is a fabulous artist and designer, she seems to be a little intimidated by the smaller work area of a card. So, she asked me to make a card for Malachi's birthday which will be in the theme of John Deere tractors. I had to go searching for an image to suit the occasion and found the one I used on this card at DigitalInkCo.com. I have only recently started using some digital images. I have to admit, I had considered them "cheating" but I have discovered that I really like how quickly the product is delivered, the itty bitty storage space, and the flexibility of being able to resize the iamges to my project. There is no danger of me giving up my actual rubber and acrylic stamps, but I love having options!
For this card, I decided to try the easel card that was featured as a technique challenge over at Splitcoaststampers. This was soooooo easy and lots of fun. In fact, I want to go back and do another one while I have a few minutes to do some stamping! I used markers to color the image and sponged a little blue and green around the background. The sentiment image is from Close to My Heart as is the little wheel image I used to make the stop on the easel stand. The background paper is by Basic Gray and I ran the yellow cardstock through the BigShot with the Cuttlebug diamond plate embossing folder. I think my friend will be pleased with the card I created for her grandson. I hope you enjoy it too!


Sunday, October 11, 2009

Sure ham glad I got this set!


When I went to the mailbox yesterday, I was really expecting it to be empty. All the bills that come at this time of the month are in and I haven't ordered anything new. Imagine how excited I was to see the padded yellow envie from Canada!! I knew one of the new sets from Totally Stampalicious (check them out at the  link on the right just below the Totally Spampalicious badge) would be in it, but I didn't know which one it would be. This Farmer Hawg set is so perfect for me! Hubby works on a farm and we live out in the country. Wild hogs are regular visitors to our yard and cow pasture, and sometimes they don't move along quickly enough and they end up in the freezer!! As soon as sweet little Kyli was safely back with Mommy and Daddy, I had to ink up my new set!! I was planning what papers to use as I was driving Kyli home.

The papers are from Basic Gray's Granola collection. Most of them are pretty masculine and thought the striped sheet would make some cool bibs for my cute little farmer! The layout is completely random. Just cut some pieces from the stack and added them to the card base. Colored the image with markers and sponged the sky with light blue ink. Popped the image layer up with dome pop dots to get it above the twine. Added some copper brads, dew drops and a little swatch of ribbon. Just a quick, easy card.

Okay, Rachael, now I'm off to work on your wedding invitations!!! Promise!!! I have an idea in my head that I think you will really like!

Spooky Cupcakes

I actually made this card a couple of weeks ago at the ScrapPink crop. Things have been so crazy lately that I am just now getting around to posting it.  I just love this spooky cupcake stamp by Impression Obsession. I colored the image with a mixture of Copic, Prismacolor, and Stampin' Up! markers. the designer papers are from Basic Gray's Eerie collection. The lacy trim is from a roll I picked up at JoAnn's. When I added it to the card, it really reminded me of Lily Munster....remember that crazy old show?


Tuesday, September 29, 2009

Haulin' Pumpkins

This is for the Monday challenge over at the Totally Stampalicious blog. This weeks challenge was to make a masculine card using any stamp set. I used the Road Hawg set from Totally Stampalicious for my card. The sentiment is a dollar stamp from Michael's that I got years ago. I colored my hog image with Copic and Prismacolor markers. The trailer was made by piecing together a couple of pieces of Close to Cocoa cardstock that I ran through the Cuttlebug using the weathered wood embossing folder. The wheel on the trailer is from a set of Nascar stickers with a jumbo eyelet in place of the racing rim. a photo turn acts as my trailer hitch. The pumpkins are made from ribbon by May Arts that I bought at my local scrap and stamp store, Priceless Scrapbooks, I used the faux burnt edges technique to do the background and edges of the image layers.

Stamps: Totally Stampalicious
Ink: Momento Tuxedo Black and Tim Holtz distress inks
Paper, Close to Cocoa, white, orange, BoBunny dotted paper and unknown striped paper from scrap pile
Accessories: Pumpkin ribbon, Copic and Prismacolor markers, sponge, jumbo eyelet, photo turn, cuttlebug folder

Sunday, September 27, 2009

Hawg Wild Christmas

Wow!! I can't believe how crazy things have been!! When I saw how long it's been since I posted here, my jaw just hit the floor!
Finally got some time to play over the weekend. Priceless Scrapbooks hosted a Scrap Pink crop all day Friday and Saturday. Had to work Friday, but as soon as I got off, I headed on over for some much needed therapy! It's amazing how relaxing it is to get together with good friends and spend some time sharing and creating together!
I don't feel like I got very much accomplished as far as a total number of cards and projects, but I definitely feel like the time was well spent!!
Here is a card I made from Road Hawg by Totally Stampilicious. I think this is my favorite set of the four that were released earlier this month. I wanted to make a Christmas card with this set and decided to do some paper piecing with the new Basic Gray Christmas papers, Eskimo Kisses. I went through almost an entire 6 x 6 pad of these papers in two days! Can you see his 5 o'clock shadow?


Stamps: Road Hawg by Totally Stampalicious
Paper: Riding Hood Red, Soft Suede, Unknown granite print, Basic Gray Eskimo Kisses, Georgia Pacific White
Ink: Momento Tuxedo Black, Baja Breeze, Creamy Brown chalk ink 
Accessories: Copic and Prismacolor markers, Soft Suede marker, ribbon, buttons, sponges

Saturday, September 12, 2009

Toadally Rockin' Frog sneak peak


I had to do a card with this cute frog set from a brand new stamp company, Totally Stampalicious. I think this rockin' frog may be my favorite set....or it might be the Hawg set.....or maybe the Dawg....then again.....
Well, anyway...I love this cute little frogn I think this will make a great card for a boy, even a teen-aged one!

If you want to see more of the samples using these cute new stamps designed by some of our very own SCS gals, just head on over to the Totally Stampalicious blog to see samples and a blog roll of other designers:
http://totallystampalicious.blogspot.com/

or just do a gallery search and use Totally Stampalicious as the key word.
Thanks for taking a look!

Stamps: Rockin' Frogn by Totally Stampalicious
Paper: Garden Green, Soft Sky, Bo Bunny doted, silver, gp white
Ink: black, Versamark
Accessories: Copic and Prisma markers, clear embossing powder, dimensionals, diamondplate Cuttlebug embossing folder, brads

To see all of the creations made with Totally Stampalicious images check out the blogs of all the other ladies who are helping with the launchof this new company:

Totally Stampalicious  -  http://totallystampalicious.blogspot.com/
Cindy Motherway  -  http://mothermark.blogspot.com/

Friday, September 11, 2009

Totally Stampalicious Sneak Peak....Old Brawd


Sharing another sneak peak with you from the brand new stamp company, Totally Stampalicious. This new company will be officially open for business on September 15th. This card uses a couple of the images from one of their four new stamp sets. This set is call Old Brawd, but I don’t think she really looks all that old. The inside sentiment says “That’s gotta hurt!”  The image was colored with markers and then covered with Versamark and clear embossing powder.  Her jewelry and the flower on her hat have some sparkle added with Crystal Stickles.
Don’t forget to check the blogs of the rest of the designers to see more samples using this set and the other three new sets.
Totally Stampalicious  -  http://totallystampalicious.blogspot.com/
Cindy Motherway  -  http://mothermark.blogspot.com/
Stamps: Totally Stampalicious; Old Brawd
Paper: Georgia Pacific white, Stampin’ Up! Bermuda Bay, Dusty Durango, Bo Bunny Kitchen Spice Collection
Ink: Black, Versamark
Accessories: Markers, brads, clear embossing powder, ticket corner punch, scalloped border punch, oval punches, dimensional, ribbon, and Stickles

Woo hoo...it's a brand new stamp company!!

I can finally share my big news!! I was contacted by the founders of a brand new stamp company, Totally Stampalicious, to design some cards using images from their stamp sets that will be released for sale on September 15th!!   I am so excited about this opportunity and am still quite in awe that they asked me to join in the launch of this new business with the other fabulous stamp artists listed in the blog roll below!!! This is definitely one of the most exciting things that has ever happened to me!!  Over the next few days, I will be sharing some cards I have made using these adorable new images from  Totally Stampalicious.
The card I am sharing today uses images fromTotally Stampalicious’ set Road Hawg. I just love this set!  Can you see John Travolta in this image???  Such a fun set to play with!!! You can see other sneak peak cards on the blogs of these card designers:
Totally Stampalicious  -  http://totallystampalicious.blogspot.com/
Cindy Motherway  -  http://mothermark.blogspot.com/
Stamps:Totally Stampalicioius; Road Hawg
Paper: Silver scrapbook paper, Bo Bunny dotted paper, Georgia Pacific white card stock, Stampin’ Up! cardstock; Basic Black, Pumpkin Pie, Ruby Red
Ink: Black
Accessories: Water color crayons, water brush, circle punches, brads, deckle scissors, dimensional, diamond plate and bubbles Cuttlebug embossing folders

Thursday, September 10, 2009

Another Labor Day project

Wanted to share the other project I worked on while I was at Priceless Scrapbooks on Monday. It's just a quick Fall card I made with some of the supplies I already had out from the treat basket I posted yesterday. For this card I stamped the leaf flourish image from Inkadinkadoo's leaf set. I loaded the stamp with Pumpkin Pie ink and then dabbed the iamge with Always Artichoke and Close to Cocoa markers. Added Stickles to the whole image. The glitter in the Stickles really picked up the orange in the ink, giving the whole image a coppery sparkle. Stamps: Inkadinkadoo
Paper: Vanilla, Pumpkin Pie, BoBunny dotted paper
Ink: Pumpkin Pie, Close to Cocoa
Accessories: Markers, Ribbon, Stickles, brads

I'll be posting again in the morning...dark and early!! I will finally be able to share the exciting news that gave me the push to start a blog!!

Wednesday, September 9, 2009

Labor Day projects

 
I spent most of Monday at Priceless Scrapbooks doing some projects with Bonnie. I had some things planned to work on, but Bonnie handed me some precut boxes that she had been playing with and invited me to do the same. She gave me two cut from the same pale orange color and I thought....why not open them up, attach them together and make a treat basket? And so, I did! Ran the unassembled boxes through the Cuttlebug with a punmpkin patterned embossing folder that I just love. I wish we could still get it!! The design is so pretty when it's actually on the cardstock!! I don't know who the manufacturer is of the card stock. The  green paper is some of Bo Bunny's dotted papers...just love these. I used a Martha Stewart fence punch to make the fence from Soft Suede cardstock.The Trees and pumpkings are from Inkadinkadoo and the bats are another Cuttlebug cut and emboss folder. Added some stickles the the bats' eyes...they look really cool in real life!! I used a circle cutter to add a bottom to the inside and outside of the bowl. Someone (can't imagine who that would be) ate nearly all the chocolate in the house, so I filled it with some of Kenny's lunch cakes for the sake of taking a photo.  

Sunday, September 6, 2009

Some assesmbly required

When I was at Priceless Scrapbooks yesterday, I found these cute little bubble boxes similar to the ones I've been seeing with candy in them. These are a little bigger. I was thinking candy when I bought them, but came up with this instead. The unassembled snowman in the bubble is from a Close To My Heart set called All Decked Out. It was a stamp of hte month last year and I'm not sure if it is in the latest catty. I stamped a bunch of the parts out on white card stock and cut them all out. Some of them have a little color added to them with markers. Put the parts and chunky glitter in the bubble box and sandwiched it all between layers of card stock.
The card base is Baja Breeze. Layered on Riding Hood Red and SEI's Wintter Song dp. I think this blocked layout is a current sketch challenge somewhere because I've been seeing this layout all weekend on Splitcoast Stampers. Thought it would be perfect for this card.
The sentiment is from another snowman set I have. It is unmounted red rubber and therefore unidentifiable...sorry. Used Stampin' Up!'s Modern Label punch  and Riding Hood Red tafetta ribbon to attach it to the card.
Stamps: Close to My Heart, unknown sentiment
Paper: Riding Hood Red, Baja Breeze, GP white, SEI Winter Song
Ink: Momento Tuxedo Black, Baja Breeze, Riding Hood Red
Accessories: modern label punch, coluzzle, bubble treat holder, chunky glitter, markers, ribbon

Toadally Happy with Bo Bunny

I picked up these Bo Bunny papers at my LSS yesterday and was determined to use them right away! I had already stamped up this cute Penny Black frog image and thought he would work with these papers. Colored the image with SU, Copic and Prismacolor markers and then sponged around the image with SU's Bermuda Bay ink. Added a little Stickles to the flower and the frog before cutting out with my Coluzzle tool. I used Nestabilities to cut out the large scalloped circles. The other circles were done with punches. The small flowers are popped up on dimensionals and the frog layer is popped up twice. Added some Chocolate Chip satin ribbon and some brown blingies and there it is! The card measures 5 1/4" square.
Stamps: Penny Black
Paper: Bo Bunny dp, Dusty Durango, and Chocolate Chip
Ink: Momento Tuxedo Black, Bermuda Bay
Accessories: Sponge dauber, Stickles, Colluzzle, Nestabilities, scallop and circle punches, bling, ribbon, markers.

Remembering Tabitha


Some years ago, I was part of a traveling praise and worship team. We visited various chruches, public events, and even visited a prison in northern Florida with God's message delivered through word, song, and dance. As I am not blessed with talents in any of these areas, my role was that of sound tech and organizer. Many people played a part in Tabitha over the years and each one is very fondly remembered. This little scrapbook is a tribute to each one of them and the ministry of Tabitha.
The book is made of a chipboard cover bound together with a Bind It All coil. The pages measure 6" x 6". I kept embellishments and journaling to a minimum on the pages because of the small size and number of photos on each page. I added a couple of pages in the back to include a brief history of Tabitha.....these were exceptionally good times!